


Hey guys! Madi here with something super fun to share!
This has been the most requested post since part three of For the Love of Molly…
So here is the documentary of how I restored my very first doll! I took photos of the entire process.
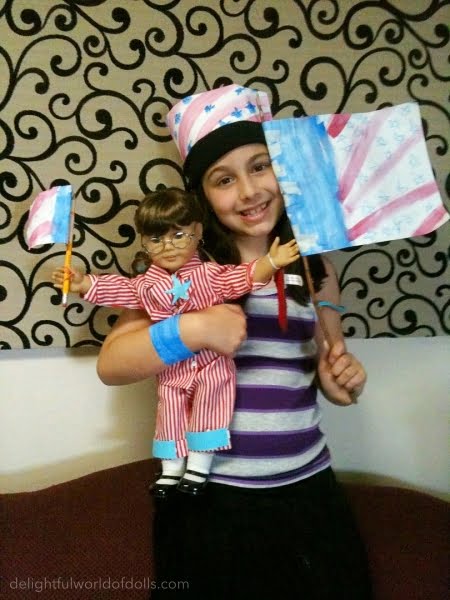
Molly and me, July 4, 2012
I got Molly McIntire brand new from American Girl for Christmas in 2011, when I was eight. Needless to say she’s been through a lot.
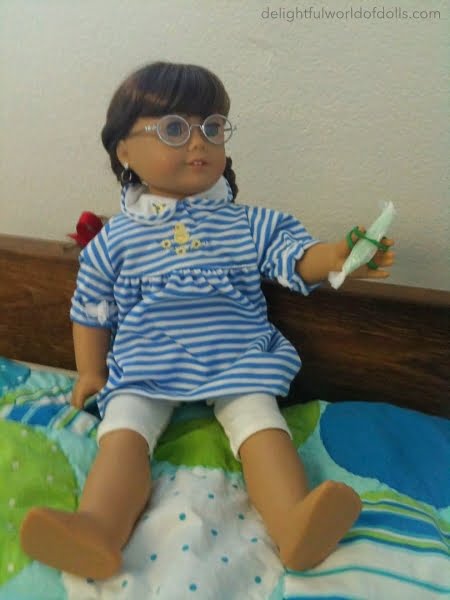
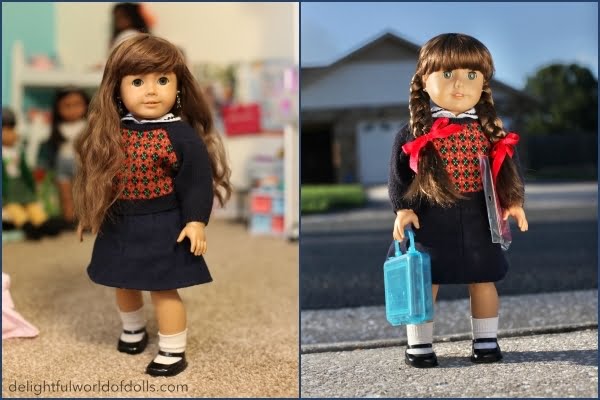
This is in August 2012 when she is still in nearly perfect condition.

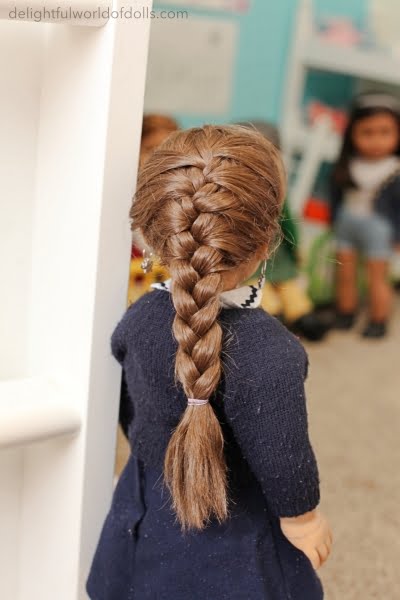
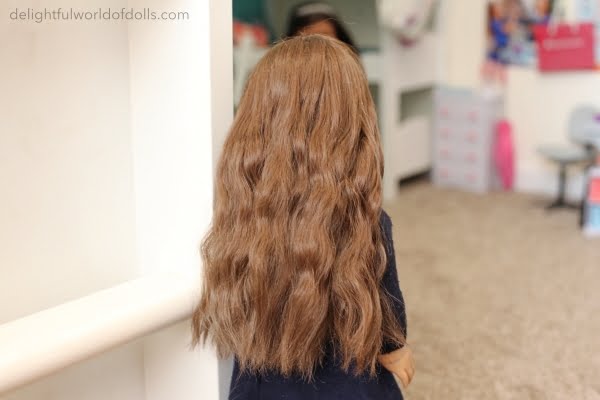
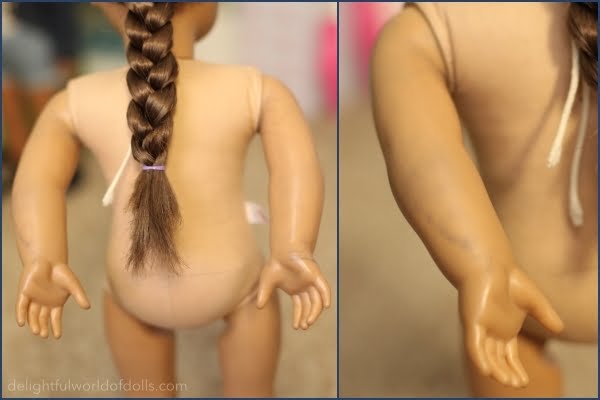
September 2012. Her hair used to be THIS nice!

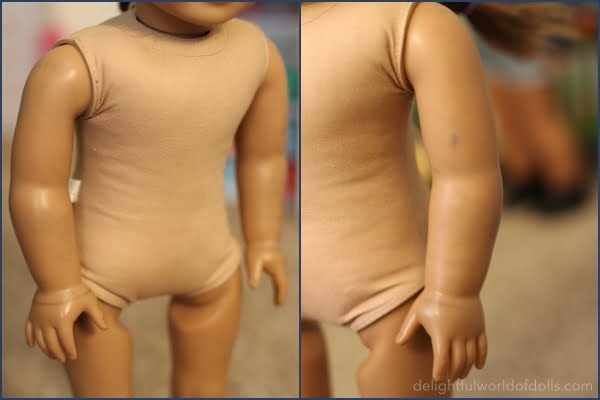
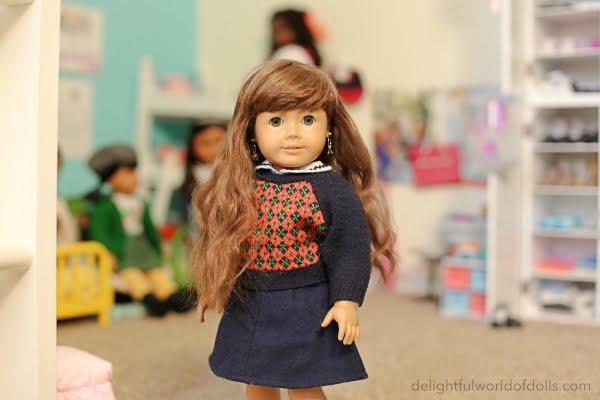
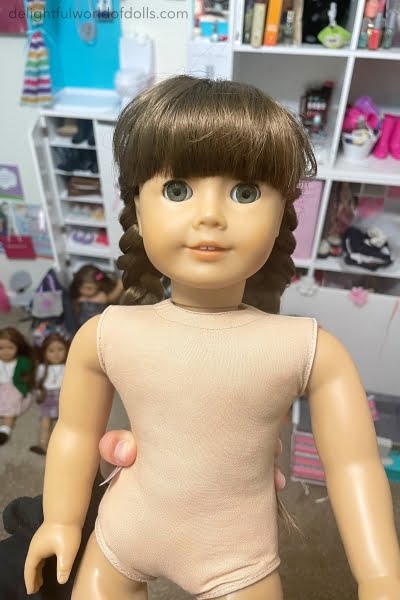
And this is March 2021. Her is her full-body “before” shot.
Even though I was very careful with my beloved doll whom I did everything with, I once unknowingly used a plastic brush on her hair. It became dry, frizzy, even faded.
Years ago I had done everything I could think of:
I washed and conditioned, even trimmed her hair. I even did a Downy dunk.
While her hair did become softer, it was never restored to its former glory. It was still faded, dry, frizzy, and had split ends.

And since she is nine and a half years old there were a lot of human hand oils and everyday dirt on her vinyl.
Her face paint was almost completely faded. She looked so pale that sometimes I would edit lip and cheek color onto her when editing photos of her.
With washable Crayola markers I would dab a bit of color onto her lips and cheeks for this photoshoot and she looked better but of course it wasn’t permanent and I would always wipe it off.
After nine and a half years her limbs were super loose, too.

It got worse! Years ago when I had my health crisis and had to stop blogging, I didn’t do hardly anything with my dolls.
I left Molly in a black long sleeved shirt for probably a year and a half and when I took it off of her, well…
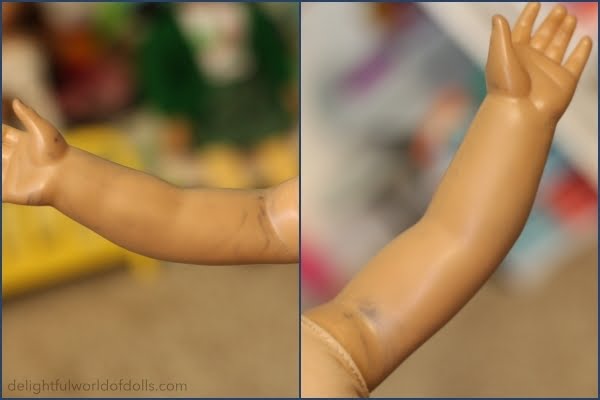
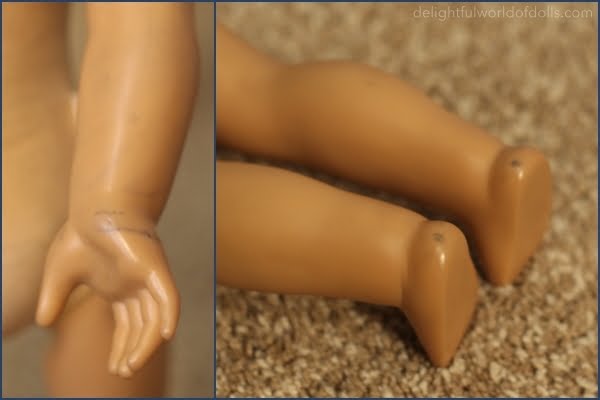
Yeah.
And somehow her feet got stained by shoes too.
But I still didn’t want to send my dearest Molly to AG’s doll hospital.
I had considered it a lot over the years, but I could never part with her original head. She was too special to me.
Replacing parts of her would be getting an entirely different doll!
Finally I decided…
It was time for a FULL makeover.
That’s right—new wig, new face paint, tightening her limbs, all of it!
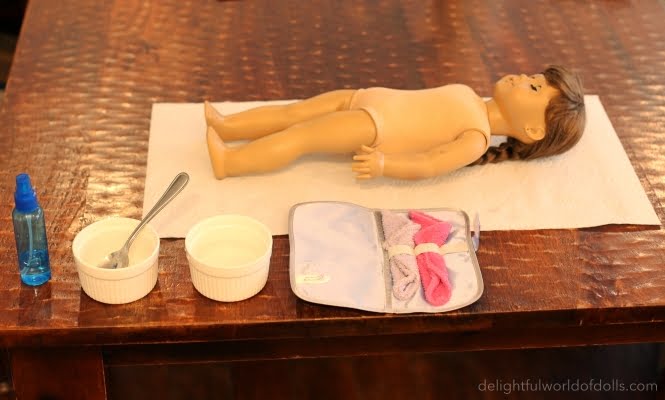
I started with a basic surface cleaning of her skin, to remove all the dirt and oils over the years.

American Girl recommends to mix baking soda and water until you have the consistency of toothpaste and to scrub in circular motions over the skin.
I did this over her entire vinyl, including her face.

Afterward, I wiped it off with a wet washcloth.
Her skin still felt grainy from the baking soda so I went over it again and again with wet paper towels. I think I even rinsed it off directly with water until all the baking soda remains were gone.

For an even deeper cleanse, I followed up with a magic eraser, which is a LIFESAVER for surface stains on the vinyl!
I moistened it first with a spritz of water from my mini spray bottle to increase its effectiveness. I rubbed over her entire skin.
The magic eraser was quite dirty by the end! Nine and a half years of dirt and oil, my goodness!
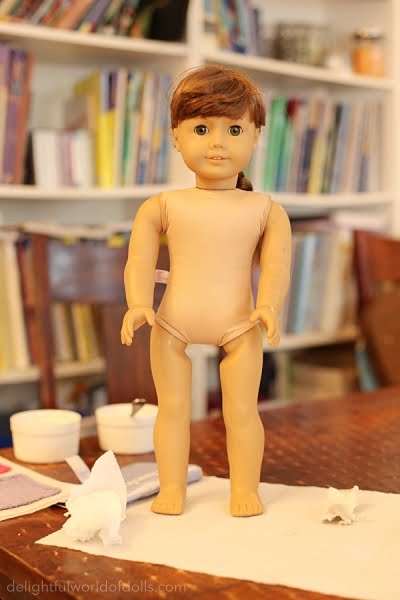
Her skin looked REALLY good by the end. I was very impressed.
The deep fabric stains were still there (I use something else for those), but her skin looked a little lighter now that the layer of dirt was off, and was mostly matte instead of shiny with oils!

For the deep black fabric stains, I hit up my favorite doll stain remover, Clean & Clear Persa-Gel 10.
It is made of benzoyl peroxide and is actually an acne treatment, and it too is a LIFESAVER.
It removes deep fabric stains flawlessly. I used it on Chloe first and then K.C. when restoring her.

I spread a generous amount of the persa-gel all over the front of her arms where the stains were.

They were everywhere on her arms but I had to start with the front because…
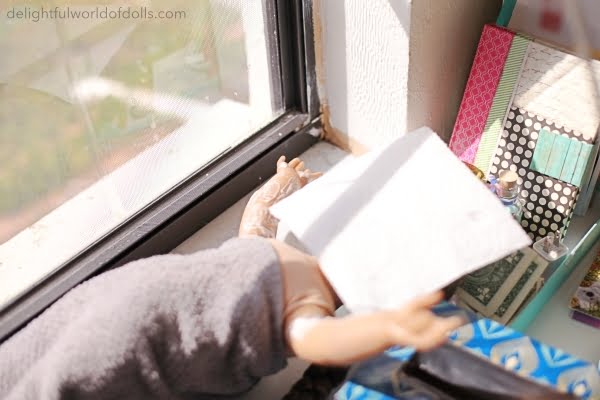
It needs heat to work and I could only heat one side at a time! I placed her in my super sunny window.
I covered her face with a paper towel for protection, I suppose, in case I would use her awful wig for some reason in the future and didn’t want it to fade more.
It takes weeks of being in the sunny window for the persa-gel to work its magic. It really needs heat.
(But please don’t use things like warming lamps because one girl literally melted her doll with that heat!)

A few weeks later, the stains were already fading!
Every few weeks I would wash the dried persa-gel off, check the stains, re-apply, and put her back in the window for another couple weeks.
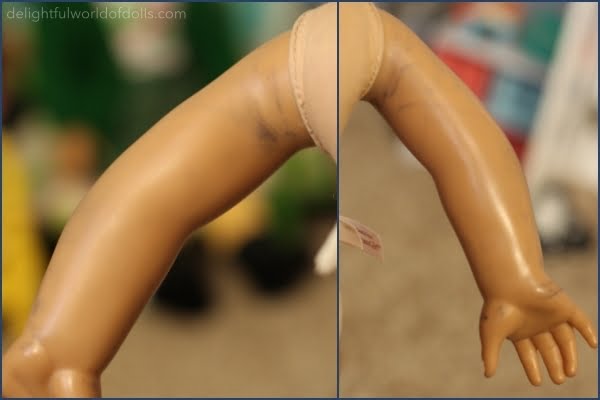
Eventually the front of her arms looked good enough to me and I flipped her over to work on the stains on the other side of her arms.
Obviously this takes forever and I got impatient. I MISSED MY DOLL.
I was dying to just paint her face and rewig her already.
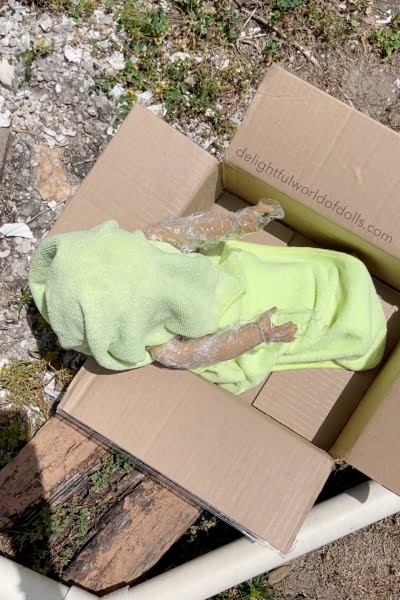
To speed the process up, after washing the dried persa-gel off and reapplying it, I wrapped it all in plastic wrap.
This keeps the persa-gel from drying out so it works even better. I covered the rest of her with towels, then placed her outside in the direct sun!
I was told this would speed up the process immensely!
I left her out (bringing her inside at nights) for two days. When I washed the persa-gel off my heart sank.
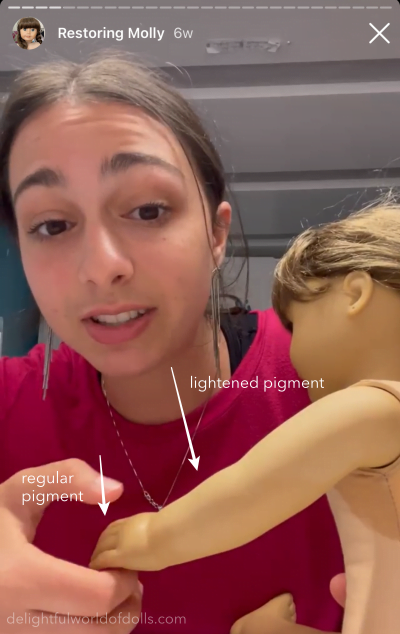
Everywhere the persa-gel had been, her skin had lightened. A lot.
I freaked out about this on my @delightfulworldofdolls Instagram stories.
Big oops, you guys.
This had never happened to me when I left my dolls in the window instead of outdoors! It had to have been the direct sunlight and leaving her outside.
It’s hard to tell in the photo above but it was pretty obvious in real life. It looked like vitiligo, which I was advised to diagnose her with if I couldn’t find a way to fix it.
I’m just going to have to deal with this, I thought. If I send her to the doll hospital there’s no way the skin tone of her new limbs would match the skin tone of her head since she is almost ten years old, and I’m NOT replacing her head. Hello, long sleeves.
LUCKILY I was told that it would fade over the next 24 hours and go back to completely normal—this was just the persa-gel leaving the vinyl!
They were right!
Within 24 hours the lightened pigment had completely gone back to normal and I continued with the stain treatment.
Every day or two of leaving her in the sun wrapped in plastic, I would wash the persa-gel off, check, wait a day or two for any pigmentation to return to normal, then re-apply the persa-gel, rewrap, and leave her out again.
Eventually I was satisfied. It wasn’t totally perfect but it had been two and a half months since starting her stain treatment (please do the sun thing, weeks in the window ain’t fun XD) and it looked great to me!
Next came REPAINTING HER FACE, BOIS AND GORLS.
I would have been quite nervous if I hadn’t already practiced on Josefina first. Her face paint was also faded so I used watercolor pencils + water to give her some more.
I do not recommend this method. The watercolors were awful and I ended up completely starting over twice.
I used mod podge as sealant on Josefina and it was absolutely atrocious. I wiped it all off after starting over twice and left it unsealed, which means it could be removed easily.
For Molly, I needed a different method for sure!
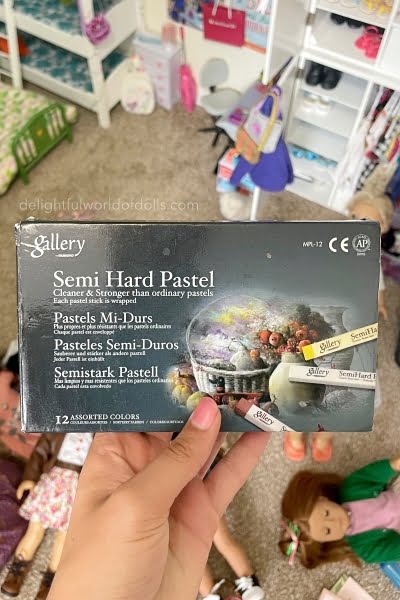
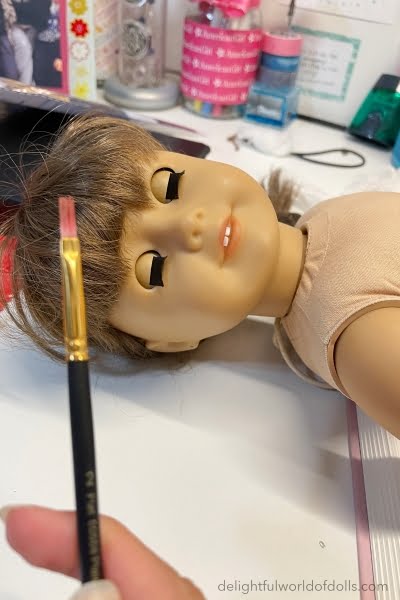
Enter pastels! I was advised to use soft pastels but all I had were these and they worked just fine.
I rubbed colors that I wanted onto a folded piece of paper, then mixed them all together with a small, flat paintbrush.
I kept adding more pigment until I got a color I liked. For Molly, I used lots of brown, a bit of red, and sometimes a teeny bit of pink.
I moistened the paintbrush just a bit by dipping it into a single drop of water and/or just dabbing it onto a wet paper towel.
Then I dipped it into the mixed pigment a few times and painted Molly’s face!

I did multiple layers on her lips.
For her cheeks I painted it on a tad, then used a moist paper towel to rub it in naturally. It takes a bit of trying and layering to get the look you want, so be patient and keep experimenting!
If you make a mistake, quickly wipe it off with a wet paper towel.
I was not able to remove her cheek paint, however, since I really rubbed that in as opposed to simply applying straight paint onto her libs.
The pastels will stain vinyl (which is exactly what we want with painting) if you don’t wipe it off quickly, and will still stain even if you manage to wipe a surface layer off after it’s dried, so wipe off any mistakes fast! Have the wet paper towel handy!

Before and after! After this shot, I went over with a few more layers of a pinker pigment but it looks so much better.
I didn’t seal it this time, but it’s not coming off, so… ?
When it dried, sometimes the pastels would leave a residue that wasn’t rubbed in all the way, like dried powder.
I waited for the pastels to dry completely, then very gently rubbed the dried power-looking remains off with a paper towel. The paint of the pigment still stained her lips perfectly.
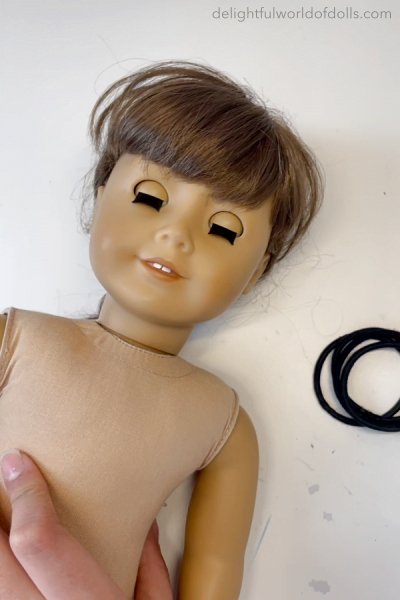
She looked AMAZING. I didn’t do a perfect job but I was pretty satisfied.
NOW IT WAS TIME FOR THE REALLY FREAKY PART.
TIGHTENING HER LIMBS.
I used a very simple tutorial, totally unprofessional. You just need four hair bands and a spoon.
*CREEPY DOLL PICTURE AHEAD*

I had to remove all the stuffing from her body. You will be AMAZED the massive amount of stuffing that is packed into a doll’s little body!!

Then for each limb I pulled the elastic as tight as I could and held the distance by tying a thick hairband around it as many times as I could.
I did this for all four limbs!
It was difficult to get all the stuffing back in—I had to use a spoon to literally mash the stuffing all down inside of her.
It looked pretty intense. XD

Molly didn’t mind! After her surgery she LOVED her tight new limbs!
I was told that this method isn’t permanent and that her limbs will loosen again but I am not about to buy clamps and use pliers to clamp metal spaces on the elastic.
Not when hairbands are easier. If they loosen again, ehhh I’ll cross that bridge when I get to it XD
Did I say tightening her limbs was freaky? Well, now was the REALLY freaky part: rewigging her!
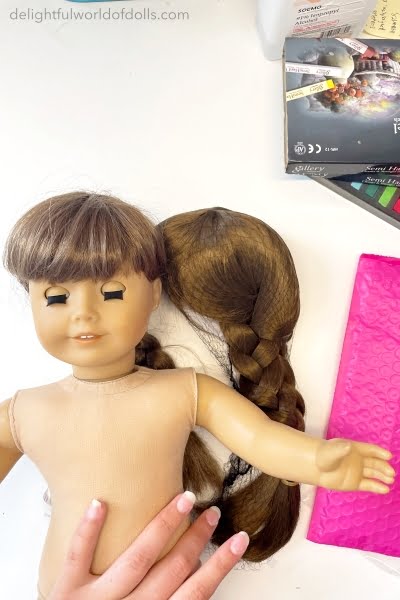
I bought a beautiful Molly replacement wig off of Etsy when it went on sale and used a $25 Etsy gift card I had, so it only ended up costing me like 45 cents!

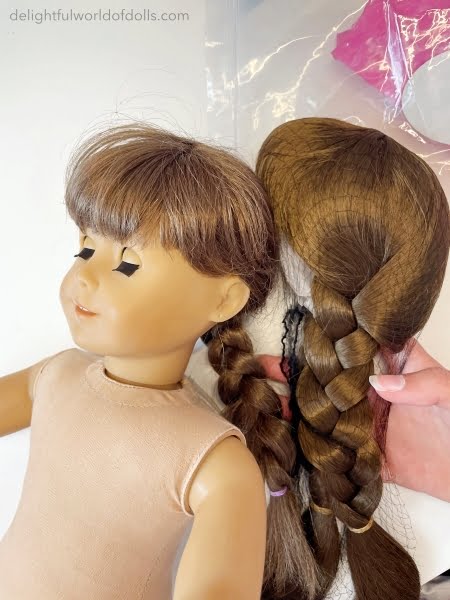
This is a 35th anniversary edition Molly—SURPRISE! I’ll explain why I got her later—and this is the replacement wig from Etsy compared to her hair.
It looks like a stunning match! It’s a bit too long but I can trim it later if I want.
*CREEPY DOLL PHOTO AHEAD*

Guys. *cries*
Taking her wig off was interesting. I didn’t expect to have too much trouble, seeing as she’s nine and a half years old so her wig glue shouldn’t be amazingly strong, but I still had some trouble especially around the edges.
I used a spoon to help dig under the edges of her wig and pull.
Don’t be afraid to use a lot of strength and to pull HARD. You’ll need it.

This is before I glued the wig down, but I set it on her head just to see what it looked like. Here’s a quick before and after.
To apply the wig, I ordered and used this tacky glue!
You’re supposed to apply the glue on the head first, then pull the wig on, but I was pretty worried about getting glue on the wig.
So I applied glue to the top of her head first, skipping the edges, and applied the wig.
After that dried (24 hours), with a paintbrush I went under the edges all around.
I don’t recommend.
I got glue on her hair this way, lol. So next time I will do it the way that I initially hesitated to. I had to do a ton of adjusting, too, to get the edges to lay right with the glue.
To keep the wig to her head while it dried in some places I put a hairband around her head.
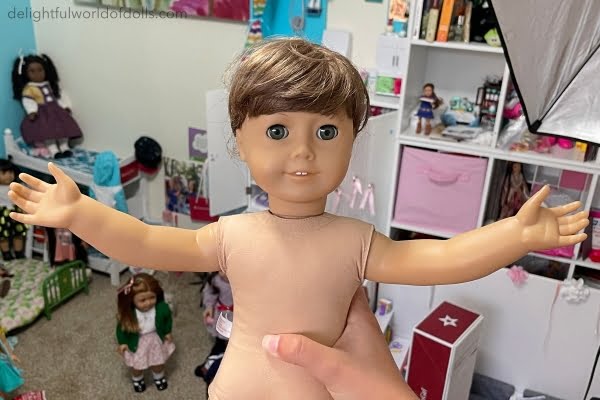
After a few days of fiddling with gluing down edges, HERE SHE IS.
Sadly this wig felt super slimy upon styling and even though the kind owner said there wasn’t supposed to be any product in it, I had to wash her hair.
I got the glue wet and had to re-glue the edges, lolllll, clearly I cannot restore a doll properly.
BUT SHE IS DONE.
HERE SHE IS, IN ALL HER BEFORE AND AFTER GLORY.
I may trim her wig because it looks too long, but I can do that later!


WHAT DO YOU THINK OF MISS MOLLY’S RESTORATION??
I’m so happy with how beautiful she looks! She looks pretty much brand new and I proved to myself I can totally restore a doll!
The only thing I’m missing is learning how to eye swap… *shudders*

Is that a 35th anniversary Samantha I see?

Nothing to see here!
What I used to restore Molly:
- Clean & Clear Persa-Gel 10 to remove deep fabric stains
- Mr. Clean Magic Eraser to remove tough surface stains + layers of dirt and oil that baking soda couldn’t remove
- Mungyo Gallery Semi-Hard Pastels to paint her lips and cheeks
- Aleena Original Tacky Glue to glue her new wig on; most people I talked to used tacky glue. This glue is strong enough to keep it on but not so permanent that I could not remove the wig again in the future if I wanted! If you are wanting a VERY strong option, try E6000 glue.
- Bbeauty Designs Molly Classic Replacement Wig, the best Molly replacement wig I could find!
- Another popular Molly replacement wig option I considered but did not use is this one: Kemper Doll Supplies Plaits Wig. Choose the “light brown” color and the 10-11 size (for 18″ dolls).
- A small spoon helped me mash the huge amount of stuffing back inside of her after tightening her limbs. It also helped me with pulling her wig off—I slipped the edge of the spoon under the edges to help pry it off.
- Four small thick hairbands to tighten her limbs. I pulled her original elastic from her limb caps tight and to keep it taut, filled the space by tying a hairband around it as much as I could.

Overall, this was REALLY fun and I would not hesitate to do it again. I love Molly’s newly restored look and I’m so happy with her!
Special thanks to the followers on the @delightfulworldofdolls Instagram for giving me so much advice on how to restore Molly! You guys make my day!
Which one of your dolls could use the most fixing up? Would you ever try rewigging a doll?


best glow up of 2021 ?
Yessssss ?
I loved reading this post! Molly is so pretty! You’re making me want to get a molly of my own……
I also can’t wait to find out why you bought the 35th Anniversary Molly!
Thank you so much Jaffa! You should totally get a Molly of your own… Mollys are soooo cute! Yes, I can’t wait to post about it! Hehe! Thanks so much again ❤️
You did an awesome job on Molly – she looks really good! Now I have to work up the courage to restring one of my dolls. And fix her hair somehow. Unfortunately, she’s not an American Girl and has one of those chest plates, so that’ll be fun. :(
Just wondering, how long did it take you in total to restore her?
-ForestPoodle88
Thank you so much! You totally should. I think a lot of the same techniques will work for non-AG 18” dolls. So it took a few months — from the middle of March to the end of May. But the longest part was waiting weeks for her stains to be removed. If I had put her in the sun initially it would not have taken that long. And I didn’t work on her every day so if I had been super focused it would have taken shorter!
Molly looks so gorgeous! You did a really good job restoring her and it was very interesting to see the process. You scared me for a moment with the persa-gel thing though! (ALSO WHAT IS WITH THE 35TH ANNIVERSARY DOLLS I MUST KNOW!!!!!) My doll Amy finally came home from the Doll Hospital, and I have ordered my Felicity doll, so that’s exciting! Have a nice day! :)
– June (and the dolls)
I know right, I was horrified when I saw that her pigmentation was lightened! It was horrible! HEHE DON’T WORRY I WILL SHARE ABOUT IT VERY SOON! And oh my goodness, I’m so happy for you! How does Amy look? I hope Felicity arrives soon! Thanks so much, you too ?
Wow! She looks great now that I see how much she changed from beginning to end! I did some face paint of Josefina who is also 9 1/2 years old! We got our first dolls at very similar times!! Mine was for my 8th birthday in January of 2012!
I really want to find a wig for Josie, but so far I haven’t found one I like. I’m scared it’ll change her look too much.
AND??? YOU GOT 35TH ANNIVERSARY DOLLS?! *screams of jealousy and joy* I really want a 35th anniversary Molly and Samantha and Felicity and all of them. lol. If I had won your giveaway, I probably would have chosen Molly.
I’m dying to know why you bought a 35th anniversary Molly!! When are you going to introduce them?!
I hope all is well with you and your dolls! Looking forward to the next post as always!
-Haley
That’s crazy!! What did you use for her face paint?
Something you could do is maybe find a thrifted Josefina or one off of eBay or Mercari for cheap that has a wig in good condition and use that?
I DID!!! Bro that’s funny… the ones you listed are the ones I got ?
I’m going to introduce them ASAP! Teehee
Thank you so so much Haley! That means so much and I love your comments ❤️
no cuz when i was restoring pyper i had a WHOLE GALLON BAG OF STUFFING AND IT DIDNT LOOK LIKE IT WAS GONNA GO IN? but it did and now she has the firmest body out of all of my dolls. rewigging does suck. i sat on my bedroom floor for two hours prying it off her head. anyways molly looks amazing now and you did a great job xx
Dude yes, Molly’s stuffing filled up an entire empty AG doll box ? Did you ever get Pyper’s wig off?? Thank you so much, I’m so pleased with her new look ❤️
Madi Grace Thank You for sharing your Restoration on Molly. Molly is one of my sisters and I’s favorites. She is adorable.
Marilyn
Thanks for reading and commenting, Marilyn! Molly is such a cute doll for sure! Thanks again ❤️
I used matte acrylic paint for her face paint. I watered it down some for her cheeks.
I’ve been trying to find a used Josefina, but so far I haven’t been able to find any. :(
I can’t wait to see them!! Haha. That is funny.
You’re so welcome! I love all of your posts, and they deserve many comments!
-Haley
Ooh, I have to try acrylics some time! I know that’s what my friend uses and she likes them for doll face painting too.
Awwww man, that’s awful :( I hope you’re able to figure out what to do! I’m sure I’ve mentioned this before (forgive my memory ?) but have you heard of steaming it? I don’t know if you’ve already tried that or if it would help but I’ve considered doing that for my Josefina.
Felicity is my favorite of the three, but I got Molly for a special reason and Samantha cuz she was so classic!
Awww thank you so much Haley! ?❤️
Congratulations Madi A great job on Molly. My sister has the original Molly and chose her first. My twin Marilyn has Samantha and I chose Kirsten. These three are our always favorites.
Marion
Thank you so much Marion! The original three AG dolls are always so, so special and classic. ?
She looks brand new! I need to fix up Lanie cuz she’s in bad condition. (I got her used.) But her hair’s lovely, and I think I can make a pretty penny on her.
(Never selling MY Lanie though. She’s so special to me.)
Yesss you totally should! It would definitely up her sell value!
Yeah. :( You’ve mentioned it before. I don’t think it would help, because her hair is so thin at the top. I might think about it, but I’m not sure.
Felicity is very pretty, I do want her, but I want to add more variety to my collection as well, and I already want Mia, and Truly Me.. uh, one with red hair. I already have Saige, so adding more red-heads to my collection doesn’t make sense right now. :)
I also love Samantha! She’s so beautiful!
-Haley
Ohhhh okay yeah :/
That totally makes sense! I have a lot of brunettes in my collection and two redheads so I need another blonde to balance it out :P
I know right!!
She looks perfect!! I’ve done quite a few doll restorations, including the metal clamps for limbs (it’s really easy actually!), but never a wig although I have an Addy that desperately needs a new wig! Love your Molly!! ?❤️❤️❤️
ginnie/ http://www.fakingitmostly.com
Oh wow, that’s great to know it’s actually easy! If you ever rewig a doll I hope it goes super well! Thanks so much!! ❤️
She looks wonderful! I am another who used matte acrylic paint for a little cheek enhancement for my old 1987 Samantha, and a combo of matte and high-gloss acrylic paint for her lips. I didn’t know about using the pastels, so if I decide to do it again, or end up restoring another doll, it’s something I’ll need to remember.
Acrylics sound like a great option! Did you use any sealant? I definitely recommend trying the pastels, they were so easy and fun to work with!
Great job! She looks so nice!
I really need to fix up the Lea I just got. Her old owners straightened her hair, and she has stains on her cloth and her vinyl, and part of her lip paint was rubbed off.?
Thanks so much! And oh my goodness! I hope you’re able to fix her up, poor Lea ?❤️
[…] post How I Restored My First Doll! (A 2011 Molly) appeared first on Delightful World of […]
aww she looks awesome now!!!
Thank you so much Rayna!!
There is so much good information here! Thank you for sharing the process. This will definitely be helpful when I go to restore some of my own childhood dolls.
I’m so glad it’ll be helpful! Best of luck whenever you restore your childhood dolls ?
No, I didn’t use a sealant. My doll is a signed white-body Samantha and I was a little hesitant to do anything at all to her. But I finally decided that I wasn’t going to sell her and I wanted her to have a little more color. However, with the idea that I could potentially remove at least some of the enhanced color at some future time if I changed my mind, I elected not to use any sealant. It’s been less than a year and I haven’t had any problems with the color rubbing off or other issues, so I don’t know how long-lasting it will be, but for now I’m very happy with it.
That’s awesome to hear! I chose not to use a sealant either but I haven’t noticed any color rubbing off so I’m happy about that. And that I could change it in the future if I wanted. That’s amazing you have a signed white-body Samantha! ?
Aaww! She looks absolutely adorable!
She says thank you!! ?
Your molly is so cute! I’m deciding between getting 35th anniversary molly Sam or Lissie.
Oh my goodness, I got all three of those dolls so I’d be happy to answer any questions about them if you have any! Which one are you leaning towards?
Of course! You did such a good job of restoring her
I have different reasons for why I want all of them. I want Samantha because I love her series, and she is super pretty, Felicity because she would could be a relative to my Mia doll, and I love her, and molly because I adore her glasses, and she is super cute. (Actually Sam or Molly could be a cousin to Joss.) and we both have TM 56! I named her Sadie. She says hi to Chloe!
So relatable! I got Samantha because of her series too. Felicity, I think, is my favorite, and I got Molly so she could be my book canon Molly (whereas my 2011 Molly is modern). It really is hard to choose! I feel the closest collection with Felicity because I like her stories so much. I hope you’re able to pick the perfect doll!! #56 is such a cute doll — Chloe says hi to Sadie! ❤️
She looks amazing! Great job!
Thank you so much, Ava! ❤️
You did such a great job, Madi! (I’ve yet to learn to eye swap, either….)
Thank you so much! Man, I really need to… it would be fun ?
Thank you for sharing this information! One of my dolls have several stains and I and going to try the Clean & Clear Persa-Gel 10 method. So helpful!!
It works like a charm for stains! Let me know if you have any questions — I’d be happy to help!
Perfect, I am going to try it on my Kailey! She’s an older doll that was passed along to me and needs some TLC. I’ve recently gotten into the doll world and it has been so fun! Glad I found your blog!
Hurray! Feel free to let me know how it goes! And I’m so happy you’re into the doll world, isn’t it FUN? Thank you so much for stopping by — it’s so good to meet you!
Pretty dolly ?
Molly says thank you Miss Olive ☺️
Eeep, I really loved reading this and seeing the process!!! Makes me less nervous about doing a stain treatment if I ever need to, hehe! xD Thanks so much for sharing! Molly looks absolutely gorgeous <3 :D
Thank you so much Livy!! I hope that if you do a strain treatment it goes fabulously! ❤️
She looks wonderful! Good job!
~Xyra
Thank you so much!!
Oooh this is so cool, I love how she turned out in the end. I have a Samantha (Pleasant Company version) that needs to be restored, because her arms and legs are incredibly loose. So I may try to restore her sometime.
Do you know of any good resources for that?
-Quinley
Thanks so much, Quinley! I hope you can restore Samantha some time. I just looked up on YouTube how to tighten her limbs and it was super easy.
Molly looks great! Do you have any ideas of how I can fix up my 2015 Create Your Own Doll Grace? She is very worn and has these stains under her that I just cannot get rid of. I tried the baking soda and water mixture, but I feel like that made it worse and left more of those dark stains. She just looks really…tired. Any suggestions?
Thank you!
Have you tried a magic eraser? I’ve used the Mr. Clean brand and just the Walmart brand of them. If that doesn’t help, you should try the persa-gel benzoyl peroxide method I mentioned in the post. Those will remove the deep stains!
I meant under her eyes ??
Ok! Thank you ?
Here I am again….reading things late. But I had the exact same thing happen to Jessica, but she was wearing black pants! I left them on for like a few months, this was when I had like no other dolls! I was freaked out!! But I use the toothpaste, and baking soda and in the sun like for a month. It was hard. Her. Me. Alone…..maybe…..afraid! xD Ok I should stop now! But I love how she turned out! Good job!